 |
| NFT System added to Aquaponic grow beds. |
The pond has about a 1000 gallon capacity and after using a media bed sizing tool, discovered we'd be able to increase our media-bed space. We wanted to be sure that any addition we made would increase the aeration of the system, help heat the water, and fit into the available space in the greenhouse. The solution was to add an NFT (Nutrient Film Technique) system would be perfect. NFT systems require a shallow stream of water (and in our case continuous drip), runs through the media to provide essential nutrients to the roots.
 |
| The PVC tubes fit with emitters and drains. |
I was lucky enough to find four, ten ft., capped-pvc tubes. I drilled for 1/2 inch irrigation hose and added 18 drip emitters on two inch X 1/4 inch tubing. The 1/2 inch lines would be fed off a 3/4 inch feeder hose, run through a manifold, that feeds directly from our pond (soon to be stocked with tilapia). I was looking for a source for a clip to hold the 1/4 inch tubing in place for the individual emitters. I bought the post style version , cut off the post and drilled and glued the clips in the holes (perfect).
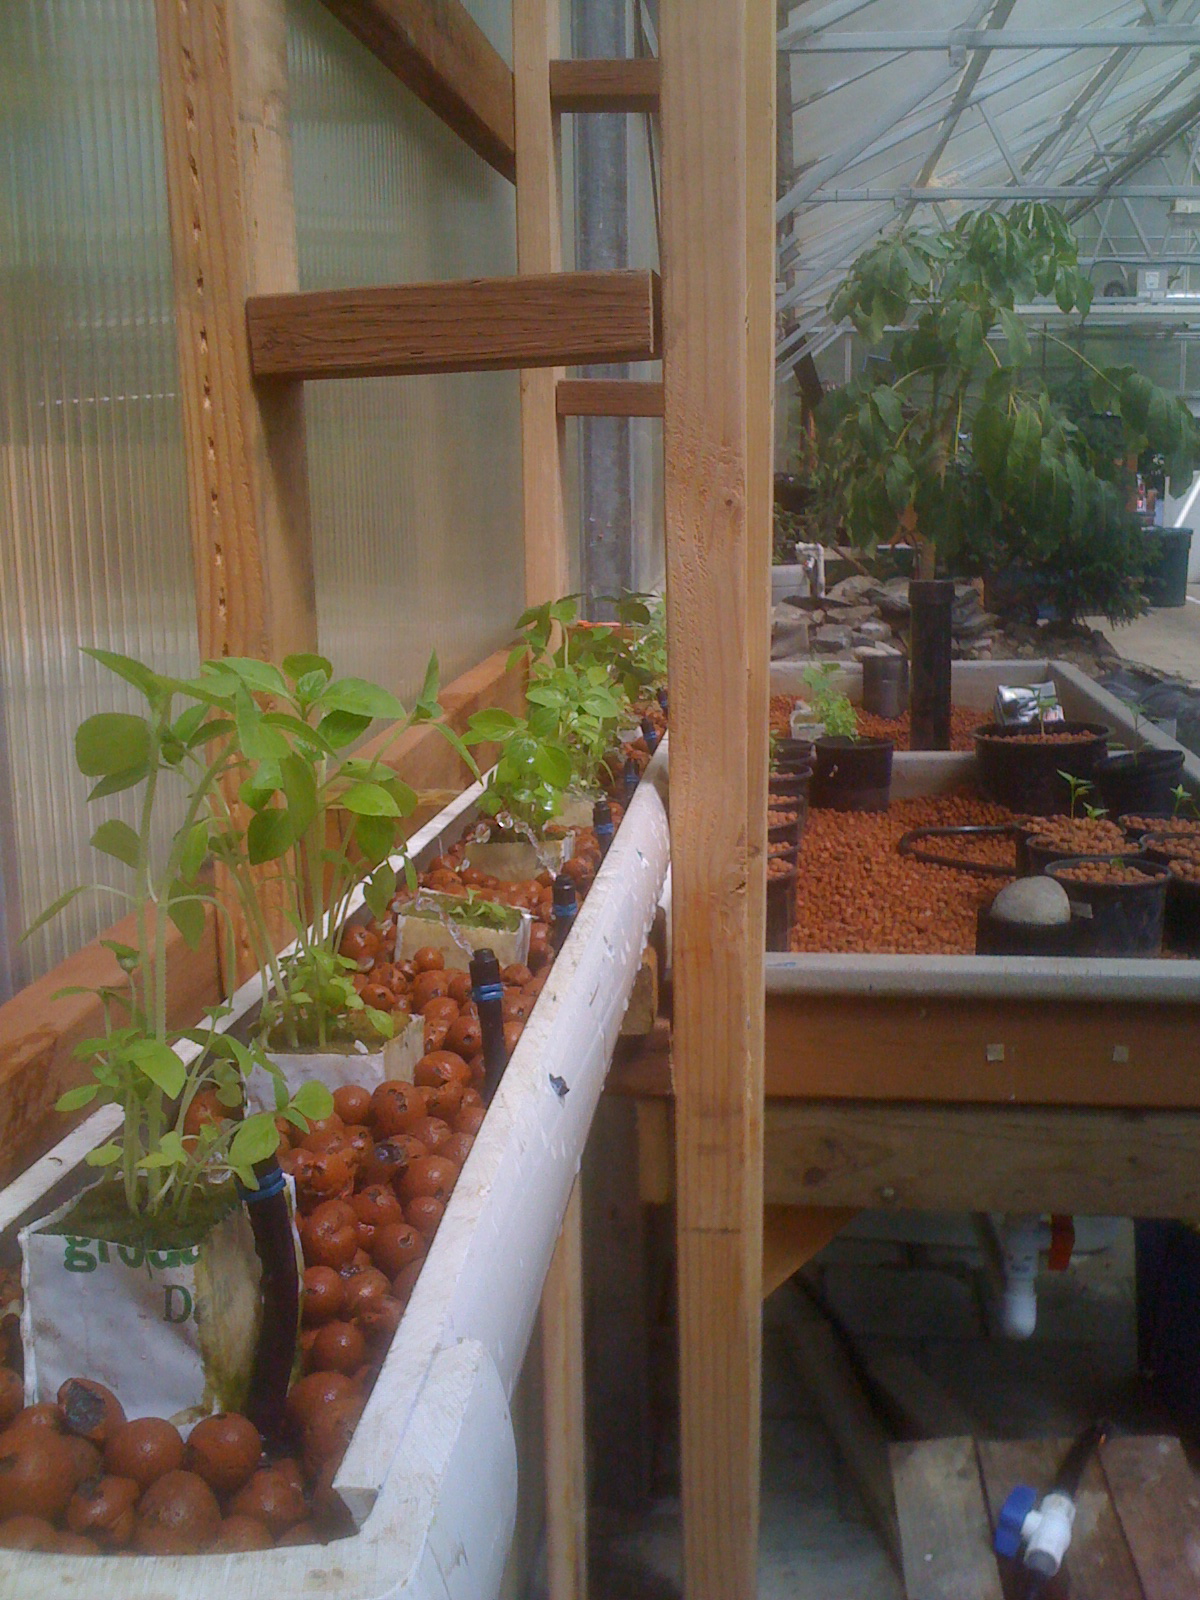 |
| Emitters are working and basil growing. |
I had enough starts to fill three of the racks. We'll wait 10 days or so and start the next tube, with additional lettuces.
System seems to work great. The flow is perfect. It fills the lower grow bed at a slow rate, and the bell siphon drains it quickly. Perfect.
 |
| Sediment tank will help grow duckweed |
We'll start tracking Ph, Nitrates, Nitrites and Ammonia, soon. Hopefully we'll start seeing signs of nitrites and nitrates that will show us the system is working.
To do list...
1. Get duckweed started
2. Start managing the science of the water (checking regularly)
3. Get the second growbed on-line and tee the 3/4 inch feed from the pond.
4. Build a third rack to support adjusting the tubes to drip only to the corner of the bed.
5. Add additional aeration (hopefully only temporary, but I want the water ready for fish.
6. Get fish
7. Start more lettuce for NFT
8. Transplant peppers and cucumbers into growbeds
No comments:
Post a Comment